
Why small engine carburetors clog in the first place
A carburetor is a precision metering device that works with openings often smaller than a sewing needle. The main jet in a typical walk-behind mower carburetor is a brass fitting with a hole a fraction of a millimeter wide. When fuel evaporates inside that passage, it leaves behind the part of gasoline that does not vaporize: gums, resins and varnish. A few thousandths of an inch of film is enough to choke the engine.
That is why the classic story goes the same way every spring. The machine ran fine last October, it sat all winter with a half tank, and now it starts for two seconds and dies, or it surges and refuses to hold an idle. Nothing broke. The fuel left in the bowl turned to varnish, and the smallest passages closed first.
If you are not sure the carburetor is even the problem, read our companion guide on why small engines will not start first. A no-start has three possible causes (spark, fuel, air), and a clean carburetor only helps with one of them.
Symptoms that point at the carburetor
Dirty carburetors have a recognizable set of behaviors. The more of these you see together, the more likely it is that cleaning will cure the machine.
- Starts on starting fluid, then dies. Spark and compression are fine, and fuel is not arriving. This is the strongest single sign.
- Runs only with the choke on. The choke enriches the mixture, which compensates for a plugged main jet.
- Surging. The engine hunts up and down at steady throttle because the jets deliver fuel unevenly.
- Black smoke and a rich smell. A float that sticks open or a needle that does not seat floods the engine.
- Fuel dripping from the carburetor or overflow. The inlet needle is not sealing, usually because of debris or a hardened tip.
- Will not hold an idle. The idle circuit uses the smallest passages of all and is the first to clog.
The two carburetor types you will meet
Most small engines use one of two designs, and the cleaning approach differs enough that it is worth knowing which you have.
| Feature | Float carburetor | Diaphragm carburetor |
|---|---|---|
| Found on | Walk-behind and riding mowers, generators, pressure washers, snow blowers | String trimmers, blowers, chainsaws, hedge trimmers |
| How it meters fuel | A float and needle hold a fixed fuel level in a bowl | A flexible membrane pumps and meters fuel, so it works at any angle |
| Weak point | Varnish in the bowl and jets, stuck float or needle | Hardened or torn diaphragms and gaskets |
| Typical cleaning | Remove bowl, clean jets and passages, check float | Disassemble cover, replace membranes and gaskets, clean screen and passages |
| Rebuild kit worth it? | Often yes | Often yes, but a new unit is sometimes cheaper in effort |
Tools and supplies you need
Most of this job is patience, not tools. Gather the following before you begin, so you do not leave the carburetor half apart on the bench while you run to the store.
- Screwdrivers that actually fit the screw heads. A worn driver strips the soft brass and aluminum screws.
- Carburetor cleaner in an aerosol can, with the thin straw attached.
- Compressed air, either a can or a shop compressor on a low setting.
- A set of soft wire strands (a single strand from a copper wire brush works) or purpose made jet cleaning needles.
- A rebuild kit for your carburetor, or at least a fresh bowl gasket, needle and fuel line.
- A shallow tray, a clean rag, a phone for photos and a jar lid to hold small parts.
- Safety glasses and nitrile gloves. Carburetor cleaner is harsh on skin and eyes.
Do the work outdoors or with the door open. Gasoline vapor and cleaner fumes are flammable, and there should be no flame, pilot light or running electric tool nearby.
Step by step: cleaning a float carburetor
1. Make the machine safe
Pull the spark plug wire and tuck it away from the plug so the engine cannot fire. On a battery equipped engine, disconnect the battery. Close the fuel shutoff valve if the machine has one, or pinch off the line with a hose clamp. Let a hot engine cool completely.
2. Photograph and remove
Before you loosen anything, take two or three photos of how the throttle linkage, governor spring and choke link connect. Springs on small engines look almost identical and go back in only one way. Disconnect the fuel line, the linkage and the mounting bolts, then lift the carburetor off, keeping its gasket in view.
3. Drain the bowl
Loosen the bowl drain screw if there is one, or simply tip the bowl contents into a small container as you remove the bowl bolt. Old fuel smells sour, like paint thinner, and may be cloudy or dark. Dispose of it at a household hazardous waste site, never down a drain.
4. Remove the bowl and float
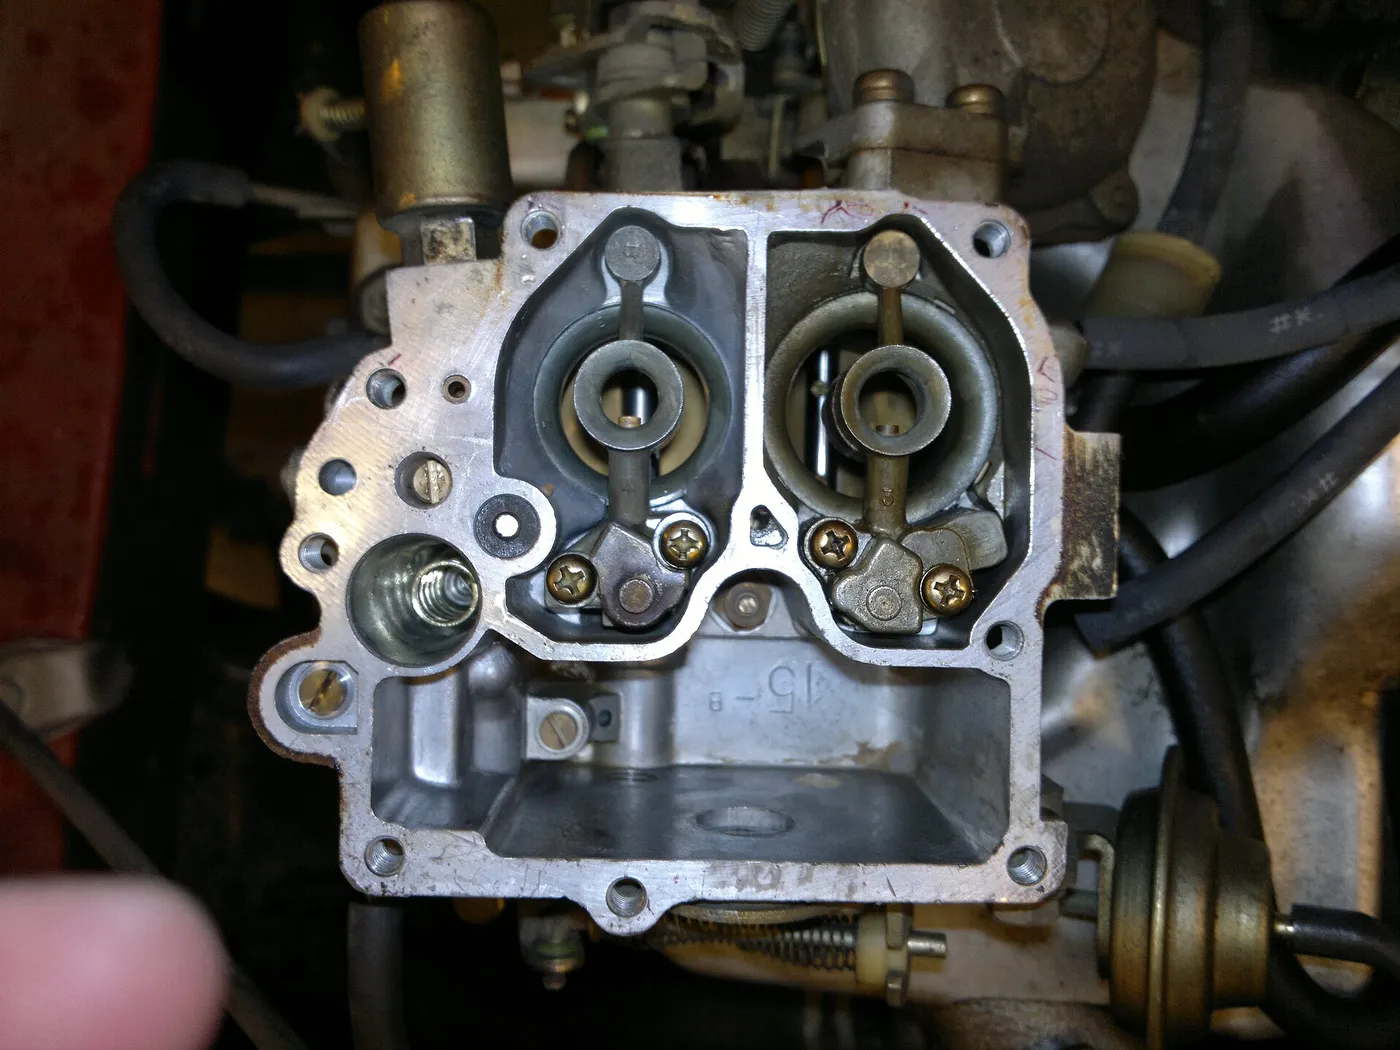
Remove the bowl nut or screws. The float is held by a hinge pin, which usually pushes out sideways. Lift the float and needle out together, and note which direction the needle clip faces. Do not bend the float arm, because the fuel level depends on its angle.
5. Inspect the float and needle
A plastic float that is cracked or has soaked up fuel will sit low in the bowl and make the engine run lean. Shake a brass float and listen for fuel inside. The needle tip should be smooth and slightly cone shaped. A needle with a visible ring or groove will not seal and should be replaced, since a leaking needle causes flooding.
6. Clean the main jet and nozzle
Unscrew the main jet using a screwdriver that fits its slot perfectly. Spray cleaner through it, hold it to the light and look through the hole. If you cannot see daylight, work a soft wire strand through gently, then spray again. Do the same for the emulsion tube or main nozzle if your model has one.
7. Clear the idle circuit and passages
Find the pilot jet or idle passage and the idle mixture screw if fitted. These holes are tiny and clog first. Spray cleaner into every opening in the body, then blow air through them. You should see cleaner coming out of the openings you expect it to come out of, and nowhere else. If a passage stays blocked, a soak is the next step.
8. Soak if needed
For heavy varnish, remove all rubber parts, plastic parts and diaphragms, then soak only the metal body in a dip style carburetor cleaner for the time on the label. Rubber, plastic and gaskets can swell or dissolve, so keep them out. Rinse, then blow dry with compressed air.
9. Replace the soft parts and reassemble
Fit the new bowl gasket, needle and any O rings from the rebuild kit. Reinstall the jets snugly but not tight, since brass strips easily. Refit the float, confirm that it moves freely and that the needle drops and lifts without catching, and close up the bowl.
10. Refit and prime
Bolt the carburetor back on with a new gasket, reconnect the linkage using your photos, and replace the fuel line and inline filter. Return the spark plug wire, open the fuel valve, and prime or pull to start. Expect it to take a few pulls while fuel refills the bowl.
Cleaning a diaphragm carburetor on a trimmer or blower
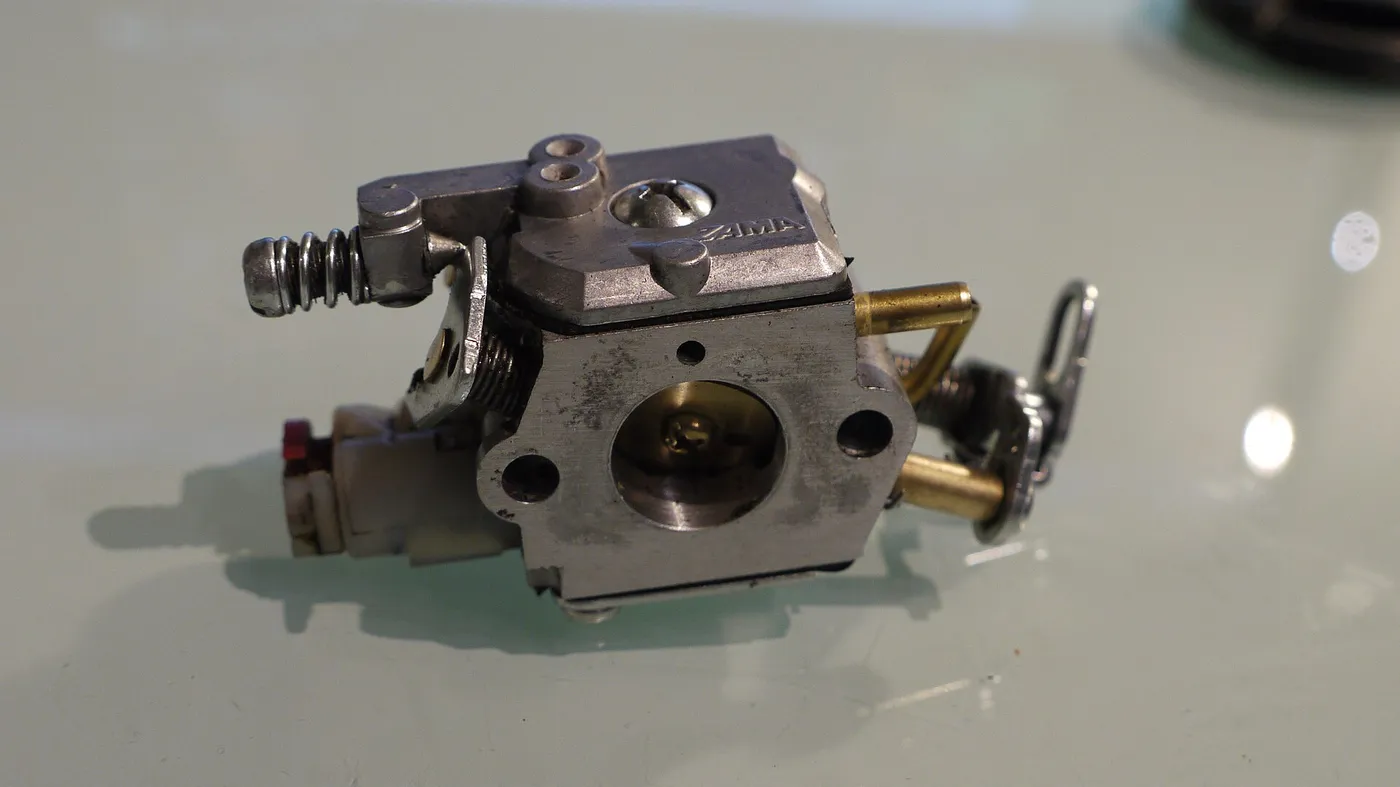
The handheld carburetor has no bowl. Fuel is metered through a thin flexible membrane, so the weak points are the diaphragms and the tiny screen behind the inlet. After removing the carburetor, unscrew the cover plates and note exactly how each gasket and diaphragm is stacked, because the order matters and they are easy to mix up.
Clean the metering chamber, the inlet screen, the check valve flaps and the passages with spray cleaner and air. Replace the diaphragms and gaskets if they are stiff, wrinkled or discolored. A hardened diaphragm will not flex, and the engine will starve at high throttle even though the idle seems fine.
Because these carburetors are small and the parts delicate, many owners find a complete replacement carburetor more reliable than a rebuild. Match the part number stamped on the body, and make sure the throttle and choke linkage points are the same.
Rebuild or replace: how to decide
| Condition | Best choice |
|---|---|
| Light varnish, jets clear after cleaning, parts intact | Clean and reuse with new gaskets |
| Pitted or corroded passages, white powdery deposits | Replace the carburetor |
| Cracked float or damaged float arm | Replace the float, or the whole unit if the body is also worn |
| Worn throttle shaft with visible wobble | Replace the carburetor |
| Brass jet reamed by a previous owner | Replace the carburetor |
| Same problem returns within a season | Replace it, and fix the fuel storage habits behind it |
A new carburetor for a common mower or trimmer engine is often cheap relative to the hours spent chasing a stubborn blockage. If you value your time, replacement is a legitimate repair, not a failure.
Quick fixes before you remove anything
Not every sticking carburetor needs to come off the engine. These less invasive steps are worth a try when the symptoms are mild and the machine is otherwise sound.
- Drain and replace the fuel. Empty the tank and bowl and refill with fresh gas. A lot of "carburetor trouble" is just old fuel.
- Replace the fuel filter and line. A filter that has gone brown restricts flow, and a cracked line draws air.
- Tap the bowl lightly. A float needle stuck to its seat sometimes frees with a gentle tap of a screwdriver handle against the bowl.
- Run a dose of fuel system cleaner. Follow the label. This helps with light varnish, not with a fully blocked jet.
- Spray cleaner into the air intake. With the air filter off, a short burst of carburetor cleaner into the throat can clear light deposits at the nozzle.
If none of these works, remove the carburetor and clean it properly, because a partial cleaning that leaves the idle passage blocked only leads to a second teardown.
Checking the float level and adjustments
With the bowl off, hold the carburetor so the float hangs with the needle just touching its seat. On many designs the float should sit parallel to the body gasket surface, but the exact specification is model specific, so use your service manual. If the float sits too high, fuel overflows. Too low, and the engine runs lean at high load.
Many modern small engines have fixed main jets set at the factory to meet emissions rules, and limited idle adjustments. If your carburetor has mixture screws, turn them in until they lightly seat, then back them out the number of turns the manual gives as a starting point. Set the idle speed with the throttle stop screw. Do not try to correct a clog by turning screws.
Fuel quality, ethanol and why the carburetor clogged
If you clean the carburetor but ignore the cause, it will clog again. The usual cause is fuel left to sit. Gasoline begins to degrade within weeks, and fuel containing ethanol can also pull in moisture. Our guide to ethanol fuel and small engine damage explains the chemistry, and the storage routine in how to store outdoor power equipment for winter is the single best way to keep a carburetor clean for years.
Two habits do most of the work. Use fresh fuel, ideally ethanol free for equipment that sits for weeks, and either add a stabilizer and run the engine for a couple of minutes to circulate it, or run the carburetor dry before storage. Makers differ on which they recommend, so follow the manual for your engine.
After the clean: restart, test and tune
With everything reassembled, add fresh fuel, set the choke and start the engine. Let it warm up for a few minutes, then check idle, throttle response and a few seconds of full load. The engine should run smoothly without surging and without smoke.
- Still will not idle: the idle passage is probably still partly blocked. Remove the carburetor and clean that circuit again, or try a soak.
- Floods or leaks fuel: the needle or float is not seating. Check for debris and confirm the needle clip is correct.
- Surges at full throttle: check the main jet and the air filter, and look for an air leak at the intake gasket.
- Bogs when you open the throttle: a lean condition. Look for a loose carburetor mount or a cracked intake boot.
Preventing the next clog
The cheapest maintenance in small engine ownership is not cleaning carburetors at all. A few simple habits mean most owners never need to open one.
- Buy only the fuel you will burn within a month or two, and write the date on the can.
- Use ethanol free fuel for equipment you run seldom.
- Add a stabilizer at storage time, run the engine, and fill the tank so there is less air space for moisture.
- Replace the in-line fuel filter and fuel line when they look cracked or discolored.
- Keep the air filter clean so the engine does not pull dust into the carburetor.
Buying a mower for the first time? Fewer carburetor problems is one more reason owners look at battery models. Our 40V lawn mower guide covers machines with no carburetor at all, while the gas lawn mower guide is the place to start if you want to stay with an engine. For a bigger step up, see how power class affects choice in our 60V and 80V roundups.
Frequently Asked Questions
Can I clean a carburetor without taking it off?
For light problems, yes. Fresh fuel, a new filter and a short spray of cleaner into the intake sometimes revive a mildly sticky engine. A fully varnished jet or idle passage can only be cleared by removing and disassembling the carburetor.
What can I use to clear a clogged jet?
Carburetor cleaner, compressed air and a soft wire strand or purpose made jet cleaner. Avoid drill bits, sewing needles and steel pins, because they can enlarge the orifice and permanently change the fuel mixture.
How do I know if the carburetor is beyond repair?
Corrosion pitting inside the bowl or passages, a wobbling throttle shaft, a warped mounting face, or a jet that was drilled out earlier are signs to replace it. A problem that returns after one clean season also points to replacement.
Is it worth soaking the carburetor in cleaner?
Soaking is worth it for heavy varnish and blocked small passages. Remove all rubber, plastic and diaphragm parts first, soak only the metal body for the time on the label, and rinse and dry it thoroughly.
Why does my engine run only with the choke on?
The choke makes the mixture richer. If the engine runs only that way, it is usually starving for fuel because the main jet or the fuel supply is restricted. A thorough cleaning of the main jet normally corrects it.
How often should I clean a small engine carburetor?
There is no calendar interval. With fresh fuel and good storage habits, many owners never need to. Clean it when the symptoms appear, and treat a repeat clog as a sign to change your fuel habits.
Bottom line
Cleaning a small engine carburetor is a patient, methodical job, not a difficult one. Rule out the fuel filter, line and air filter first, then remove the carburetor, clear every jet and passage with chemical cleaner and soft wire, and replace the gaskets and rubber parts while you are in there. If the body is corroded or worn, buy a new carburetor and move on. Then fix the cause: fresh fuel, ideally ethanol free, and proper storage. That habit, more than any cleaning technique, decides whether you ever open a carburetor again.